type
Post
status
Published
date
May 23, 2023
slug
Sharding-JDBC 分库分表
summary
Sharding-JDBC 分库分表
tags
Mysql
category
技术分享
icon
password

课程内容介绍
1、基本概念
(1)什么是 Sharding Sphere
(2)分库分表
2、Sharding-JDBC 分库分表操作
3、Sharding-Proxy 分库分表操作
什么是 ShardingSphere
1、一套开源的分布式数据库中间件解决方案
2、有三个产品:Sharding-JDBC 和 Sharding-Proxy
3、定位为关系型数据库中间件,合理在分布式环境下使用关系型数据库操作
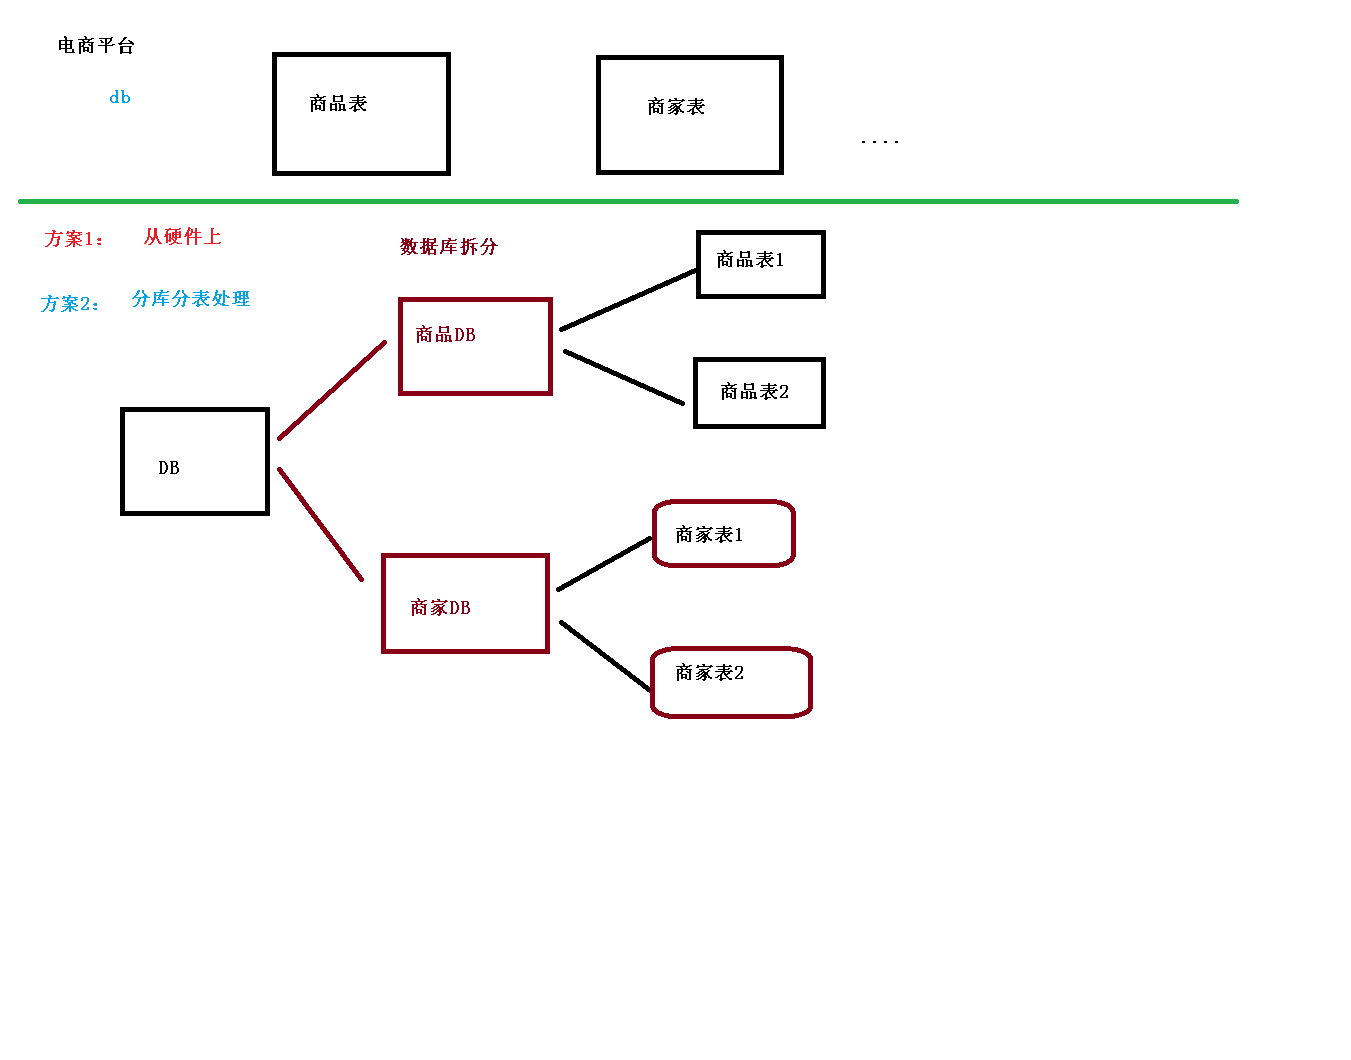
什么是分库分表
1、数据库数据量不可控的,随着时间和业务发展,造成表里面数据越来越多,如果再去对数据库表 curd 操作时候,造成性能问题。
2、方案 1:从硬件上
3、方案 2:分库分表
为了解决由于数据量过大而造成数据库性能降低问题。
分库分表的方式
1、分库分表有两种方式:垂直切分和水平切分
2、垂直切分:垂直分表和垂直分库
3、水平切分:水平分表和水平分库
4、垂直分表
(1)操作数据库中某张表,把这张表中一部分字段数据存到一张新表里面,再把这张表另一部分字段数据存到另外一张表里面

5、垂直分库
(1)把单一数据库按照业务进行划分,专库专表

6、水平分库

7、水平分表

分库分表应用和问题
1、应用
(1)在数据库设计时候考虑垂直分库和垂直分表
(2)随着数据库数据量增加,不要马上考虑做水平切分,首先考虑缓存处理,读写分离,使用索引等等方式,如果这些方式不能根本解决问题了,再考虑做水平分库和水平分表
2、分库分表问题
(1)跨节点连接查询问题(分页、排序)
(2)多数据源管理问题
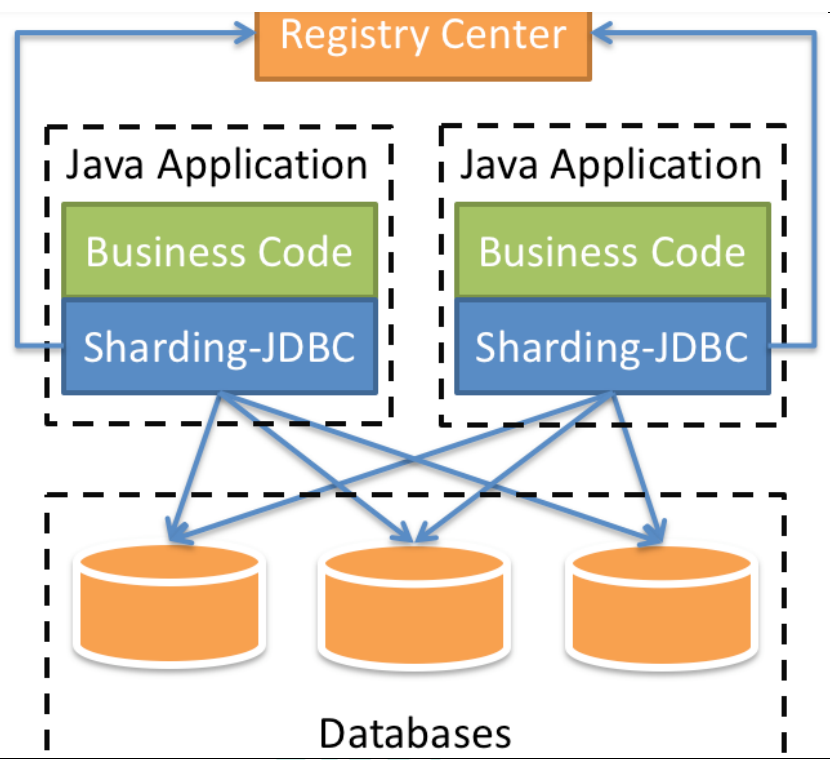
Sharding-JDBC 简介
1、是轻量级的 java 框架,是增强版的 JDBC 驱动
2、Sharding-JDBC
(1)主要目的是:简化对分库分表之后数据相关操作
Sharding-JDBC 实现水平分表
1、搭建环境
(1)技术:SpringBoot 2.2.1+ MyBatisPlus + Sharding-JDBC + Druid 连接池
(2)创建 SpringBoot 工程

(3)修改工程 SpringBoot 版本 2.2.1
(3)引入所需要的依赖
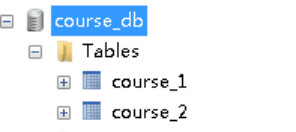
2、按照水平分表的方式,创建数据库和数据库表
(1)创建数据库 course_db
(2)在数据库创建两张表 course_1 和 course_2
(3)约定规则:如果添加课程 id 是偶数把数据添加 course_1,如果奇数添加到 course_2
3、编写代码实现对分库分表后数据的操作
(1)创建实体类,mapper

4、配置 Sharding-JDBC 分片策略
(1)在项目 application.properties 配置文件中进行配置

5、编写测试代码
(1)上面测试代码执行,报错了

(2)解决方案,在配置文件中添加一行配置
Sharding-JDBC 实现水平分库
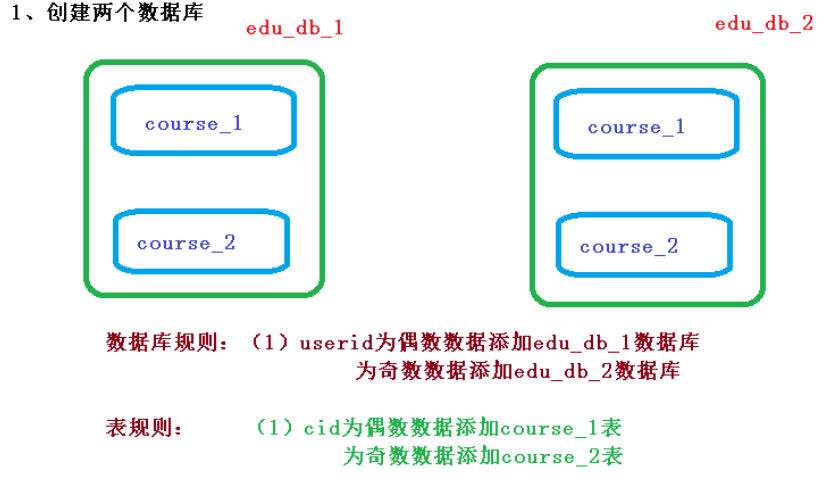
2、创建数据库和表

3、在SpringBoot 配置文件配置数据库分片规则
4、编写测试方法
Sharding-JDBC实现垂直分库
1、需求分析

2、创建数据库和表

3、编写操作代码
(1)创建 user 实体类和 mapper
(2)配置垂直分库策略
(3)编写测试代码
Sharding-JDBC 操作公共表
1、公共表
(1)存储固定数据的表,表数据很少发生变化,查询时候经常进行关联
(2)在每个数据库中创建出相同结构公共表
2、在多个数据库都创建相同结构公共表

3、在项目配置文件 application.properties 进行公共表配置
4、编写测试代码
(1)创建新实体类和 mapper

(2)编写添加和删除方法进行测试
Sharding-JDBC 实现读写分离
1、读写分离概念
为了确保数据库产品的稳定性,很多数据库拥有双机热备功能。也就是,第一台数据库服务器,是对外提供增删改业务的生产服务器;第二台数据库服务器,主要进行读的操作。原理:让主数据库( master )处理事务性增、改、删操作,而从数据库( slave )处理SELECT查询操作。

读写分离原理:
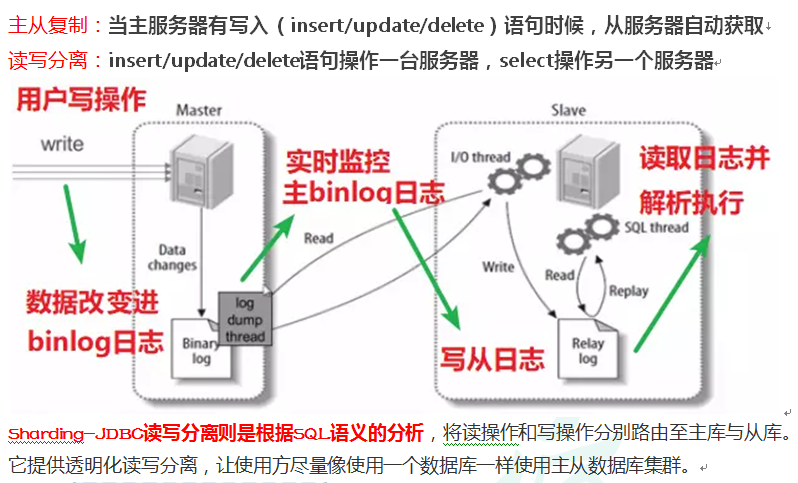
Sharding-JDBC 通过 sql 语句语义分析,实现读写分离过程,不会做数据同步
2、MySQL 配置读写分离
第一步 创建两个 MySQL 数据库服务,并且启动两个 MySQL 服务(linux环境下)
1、准备好的docker-compose文件
2、启动docker容器

Docker配置MySQL的主从复制
3、配置主库(在宿主机中操作)
cd ~/mysql_master/conf
vim my.cnf
内容如下:


4、测试主库

5、配置主库的复制账号
6、配置从库
cd ~/mysql_slave/conf
vim my.cnf
内容如下:
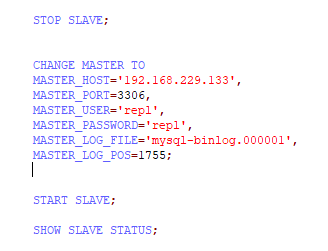
7、配置从库连接的主库
8、从库开始/停止复制
9、测试从库

3、Sharding-JDBC操作
(1)配置读写分离策略
(2)编写测试代码
Sharding-Proxy简介
1、定位为透明的数据库代理端

2、Sharding-Proxy 独立应用,需要安装服务,进行分库分表或者读写分离配置,启动
使用
3、安装
(1)下载安装软件
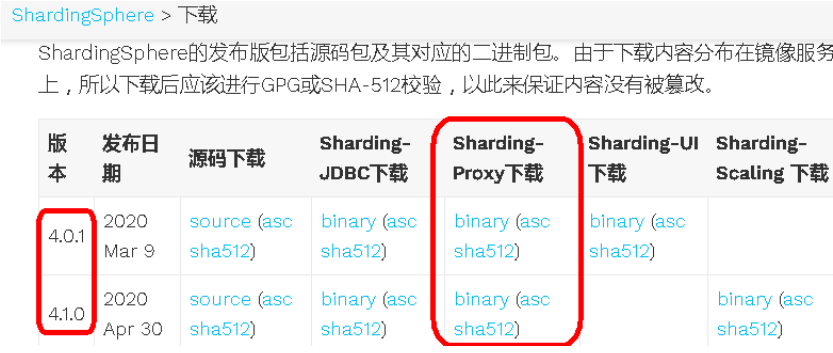

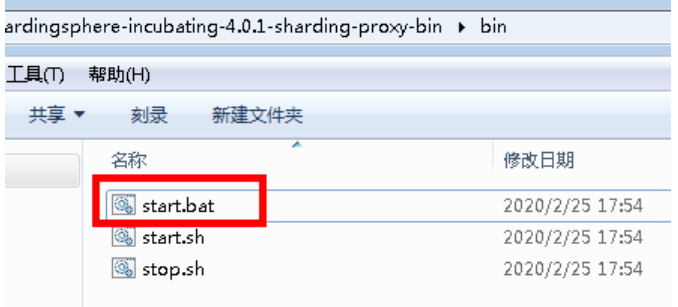
(2)把下载之后压缩文件,解压,启动 bin 目录启动文件就可以了

Sharding-Proxy 配置(分表)
1、进入 conf目录,修改文件server.yaml,打开两段内容注释

2、进入 conf 目录,修改 config-sharding.yaml

(1)复制 mysql 驱动 jar 包到 lib 目录


3、启动Sharding-Proxy服务
(1)Sharding-Proxy 默认端口号 3307

4、通过Sharding-Proxy 启动端口进行连接
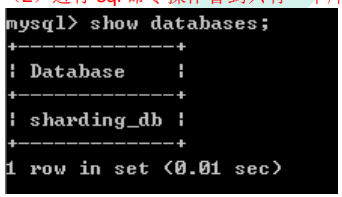
(1)打开 cmd 窗口连接 Sharding-Proxy,连接方式和连接 mysql 一样的

(2)进行 sql 命令操作看到只有一个库
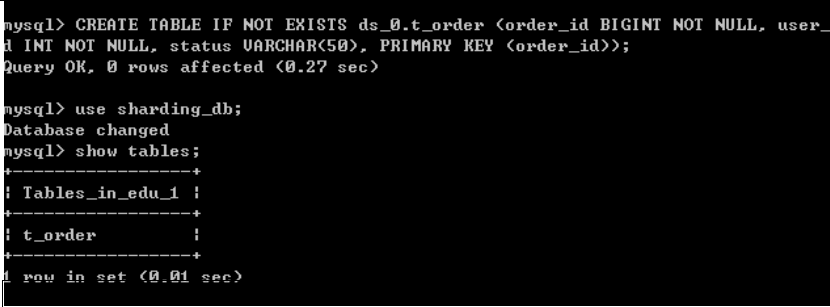
(3)在 sharding_db 数据库创建表
(4)向表添加一条记录
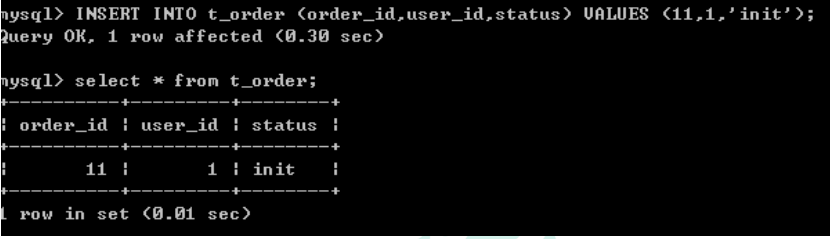
5、回到本地 3306端口实际数据库中,看到已经创建好了表和添加数据

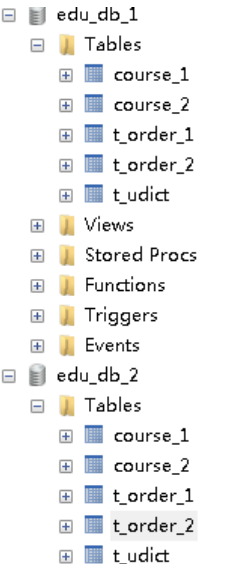
Sharding-Proxy 配置(分库)
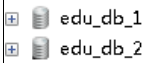
1、创建两个数据库
2、找到conf 目录,config-sharding.yaml
3、启动Sharding-Proxy 服务

4、打开 cmd仓库,连接 Sharding-Proxy 服务

(1)创建数据库表,向表添加记录

(2)连接本地 3306 的 MySql 数据库服务器,表已经创建出来,表里面有数据
Sharding-Proxy 配置(读写分离)
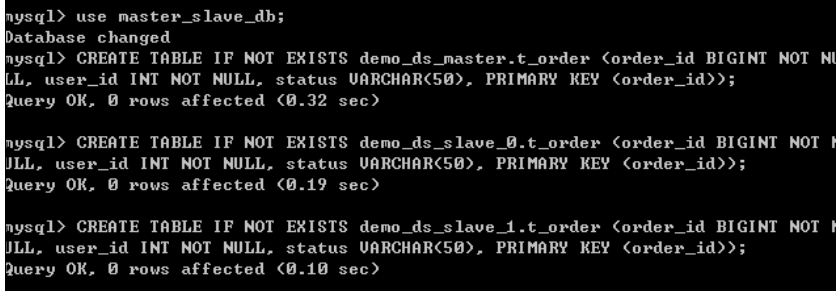
1、创建三个数据

2、修改 conf里面配置文件,config-master-slave.yaml

3、启动 Sharding-Proxy服务

4、通过 cmd连接Sharding-Proxy,进行创建表和添加记录操作

(1)在主数据库和从数据库里面,都创建数据库表
(2)向表添加记录,不指定向哪个库添加
- 把添加数据添加到主数据库里面

(3)查询数据库表数据,不指定查询哪个库
- 直接执行查询从库里面的数据
